Fixing our Splendide 2100xc
Today's blog is a technical one, so If you aren't interested in the inner workings of a Splendide 2100xc washer/ dryer combo, please fast forward to my next blog.
Splendide 2100XC in our motorhome
 For quite some time we have been noticing a degradation in the performance of the dryer portion of our combination washer/dryer. Joan found a website that had a possible solution for this. The poster explained that in these combination units where the washer is also the dryer, there is no traditional lint trap that you can pull out and clean. Instead what is supposed to happen is lint is washed away and goes down the drain with the wash water.

Once you unscrew the cap be ready with towels or a bowl to catch the moderate amount of water that will flow out. The pump chamber can be easily cleaned with a finger or paper towel- ours had no foreign objects and only a small amount of lint.
 2. Move the cycle knob to cycle #2, push the extra rinse button once (do not hold down), allow the washer to complete that whole wash cycle. (About 90 minutes)
We did this without any noticeable improvement. Note: I'm not saying it didn't work, only that it didn't solve the entire problem for us. I held my hand in front of the dryer vent on the outside of the RV and there was almost no air flow.
Next step was to get pull the dryer out to where I could get to the exhaust hose and connections.
Lucky for me It wasn't too hard because I cut an inspection hole in the wall when we installed it. All I had to do was remove the snap-in cover and uncouple the vent hose from the wall connection
Once out, I ran the dryer for a minute to see what kind of air flow I was getting- (none)
The dryer air outlet is a tight S shape. The duct exits the drum at one level and goes into an immediate 90 degree bend, then straight up, then another 90 degree bend and straight out. I took off the outside coupling ring with two screws, but still could not get my hand into the S-bend duct.
I made a wire tool to dig out lint and was only moderately successful. The lint near the top came out quickly, but the lint in the bottom bend was wet and clumped tightly together, and didn't want to move
A flexible grabber tool, the kind that has the retracting wire fingers was the right tool for getting the lint stuck in the bottom elbow. Big clumps at first, then smaller clumps as I was able to break it up. The lint was wet, picking up moisture from our last dryer run, and wanted to stick to the plastic S bend
I finished up with a cylindrical brush that I bent to match the bend in the ducting. I would sweep the sides and bottom of the elbow and attempt to get the residual lint stuck in the bristles of the brush.
All together I ended up with quite a handful of lint. Lint had almost completely blocked the first elbow coming out of the drum. Some lint stuck to other parts of the S bend and flex hose but the real problem was the very first bend.
x
Once I reassembled the dryer and slid it back into it's cabinet, we had a chance to run it in "dryer" mode and we had significant air flow to the outside!
Doing a load of laundry was further proof that the problem was solved for now.
Hope this helps someone else get their dryer back on line.
Your Traveling Friends
Jeff and Joan
Splendide 2100XC in our motorhome
For quite some time we have been noticing a degradation in the performance of the dryer portion of our combination washer/dryer. Joan found a website that had a possible solution for this. The poster explained that in these combination units where the washer is also the dryer, there is no traditional lint trap that you can pull out and clean. Instead what is supposed to happen is lint is washed away and goes down the drain with the wash water.
We have taken to washing our clothes and hanging them to dry either outside or inside, depending on the weather. Some RV parks will not allow outside clothes drying, so that means on a good day, opening all the windows and hanging clothes inside. The dryer used to work fairly well- it was never real efficient, but we'd like to have the option for machine drying again.
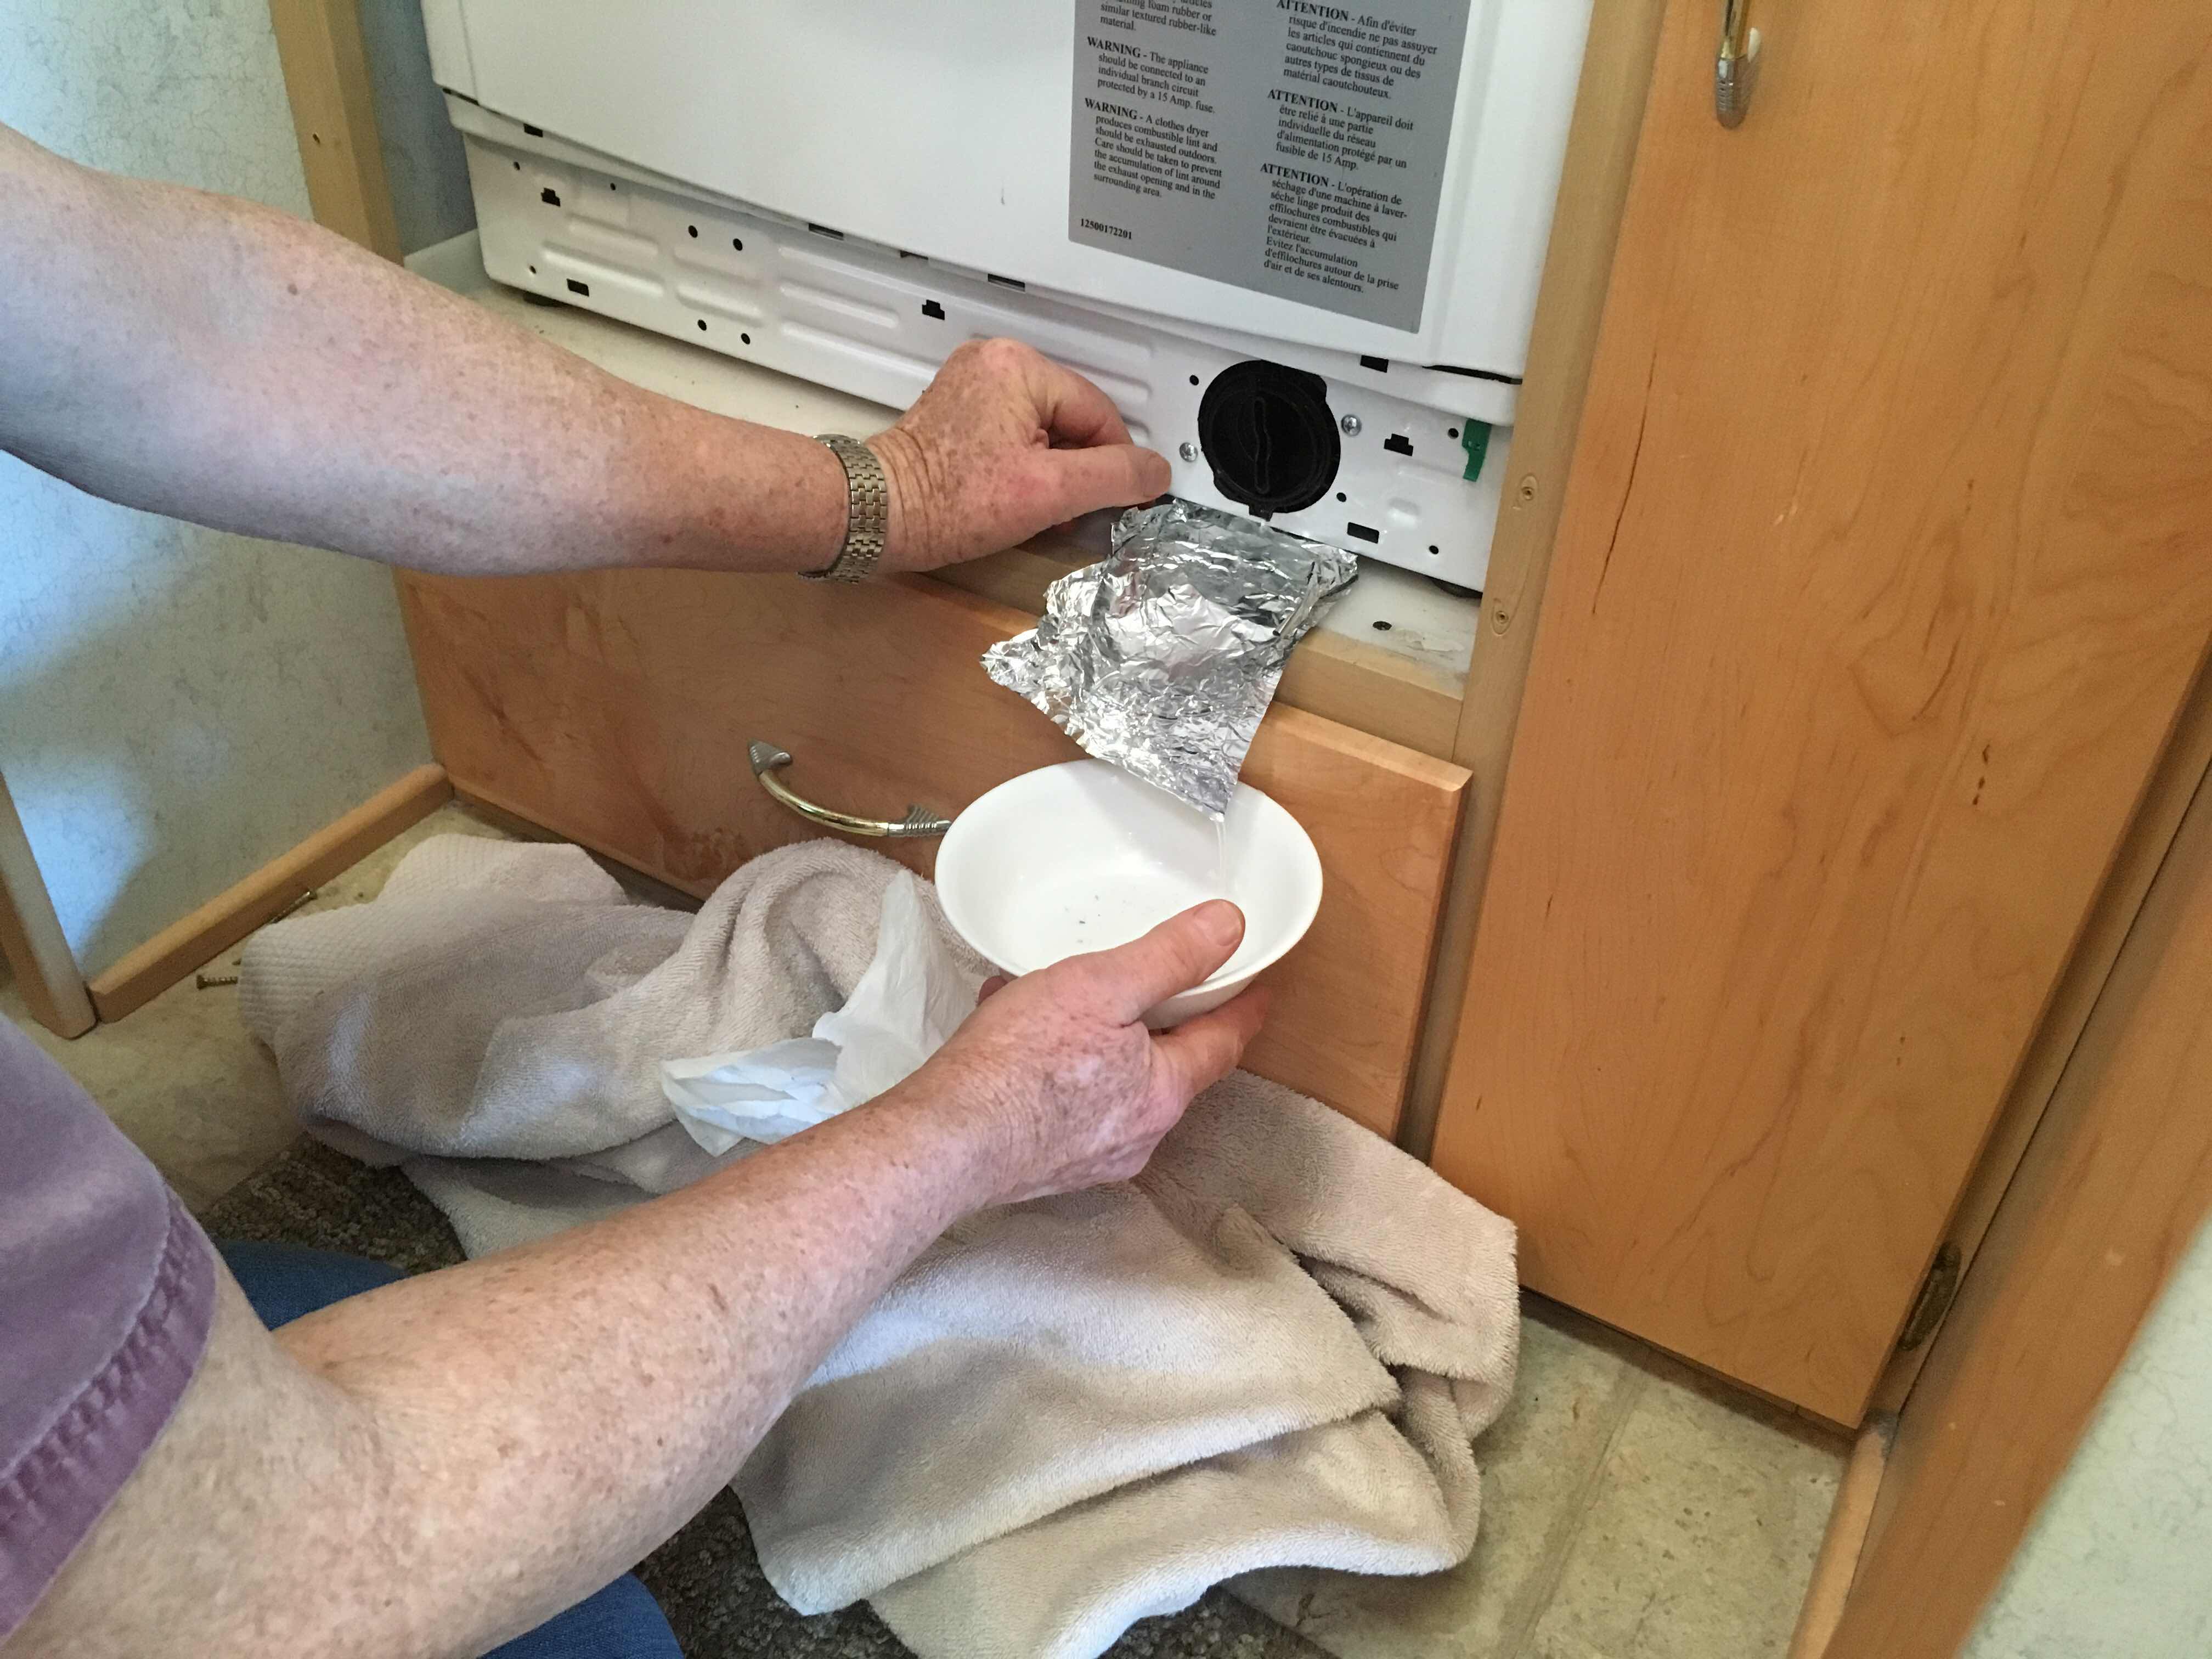
The first fix we read about recommended that we clean out the pump housing and make sure it was not plugged by coins, gravel, or lint.
To do this you have to remove the bottom front panel which exposes a cap that unscrews, exposing the impeller area of the pump.
Once you unscrew the cap be ready with towels or a bowl to catch the moderate amount of water that will flow out. The pump chamber can be easily cleaned with a finger or paper towel- ours had no foreign objects and only a small amount of lint.
The fix we read about was to:
1. Start the unit without clothes and with the dry time set to off and cycle #11 selected on the multifunction knob. When the water stops entering the drum, push and hold the Start button until all the lights on the panel come on, then release the button
2. Move the cycle knob to cycle #2, push the extra rinse button once (do not hold down), allow the washer to complete that whole wash cycle. (About 90 minutes)
3. Do this three times before trying the dryer. If the dryer works, do this process once a month (one cycle only- not three as above)
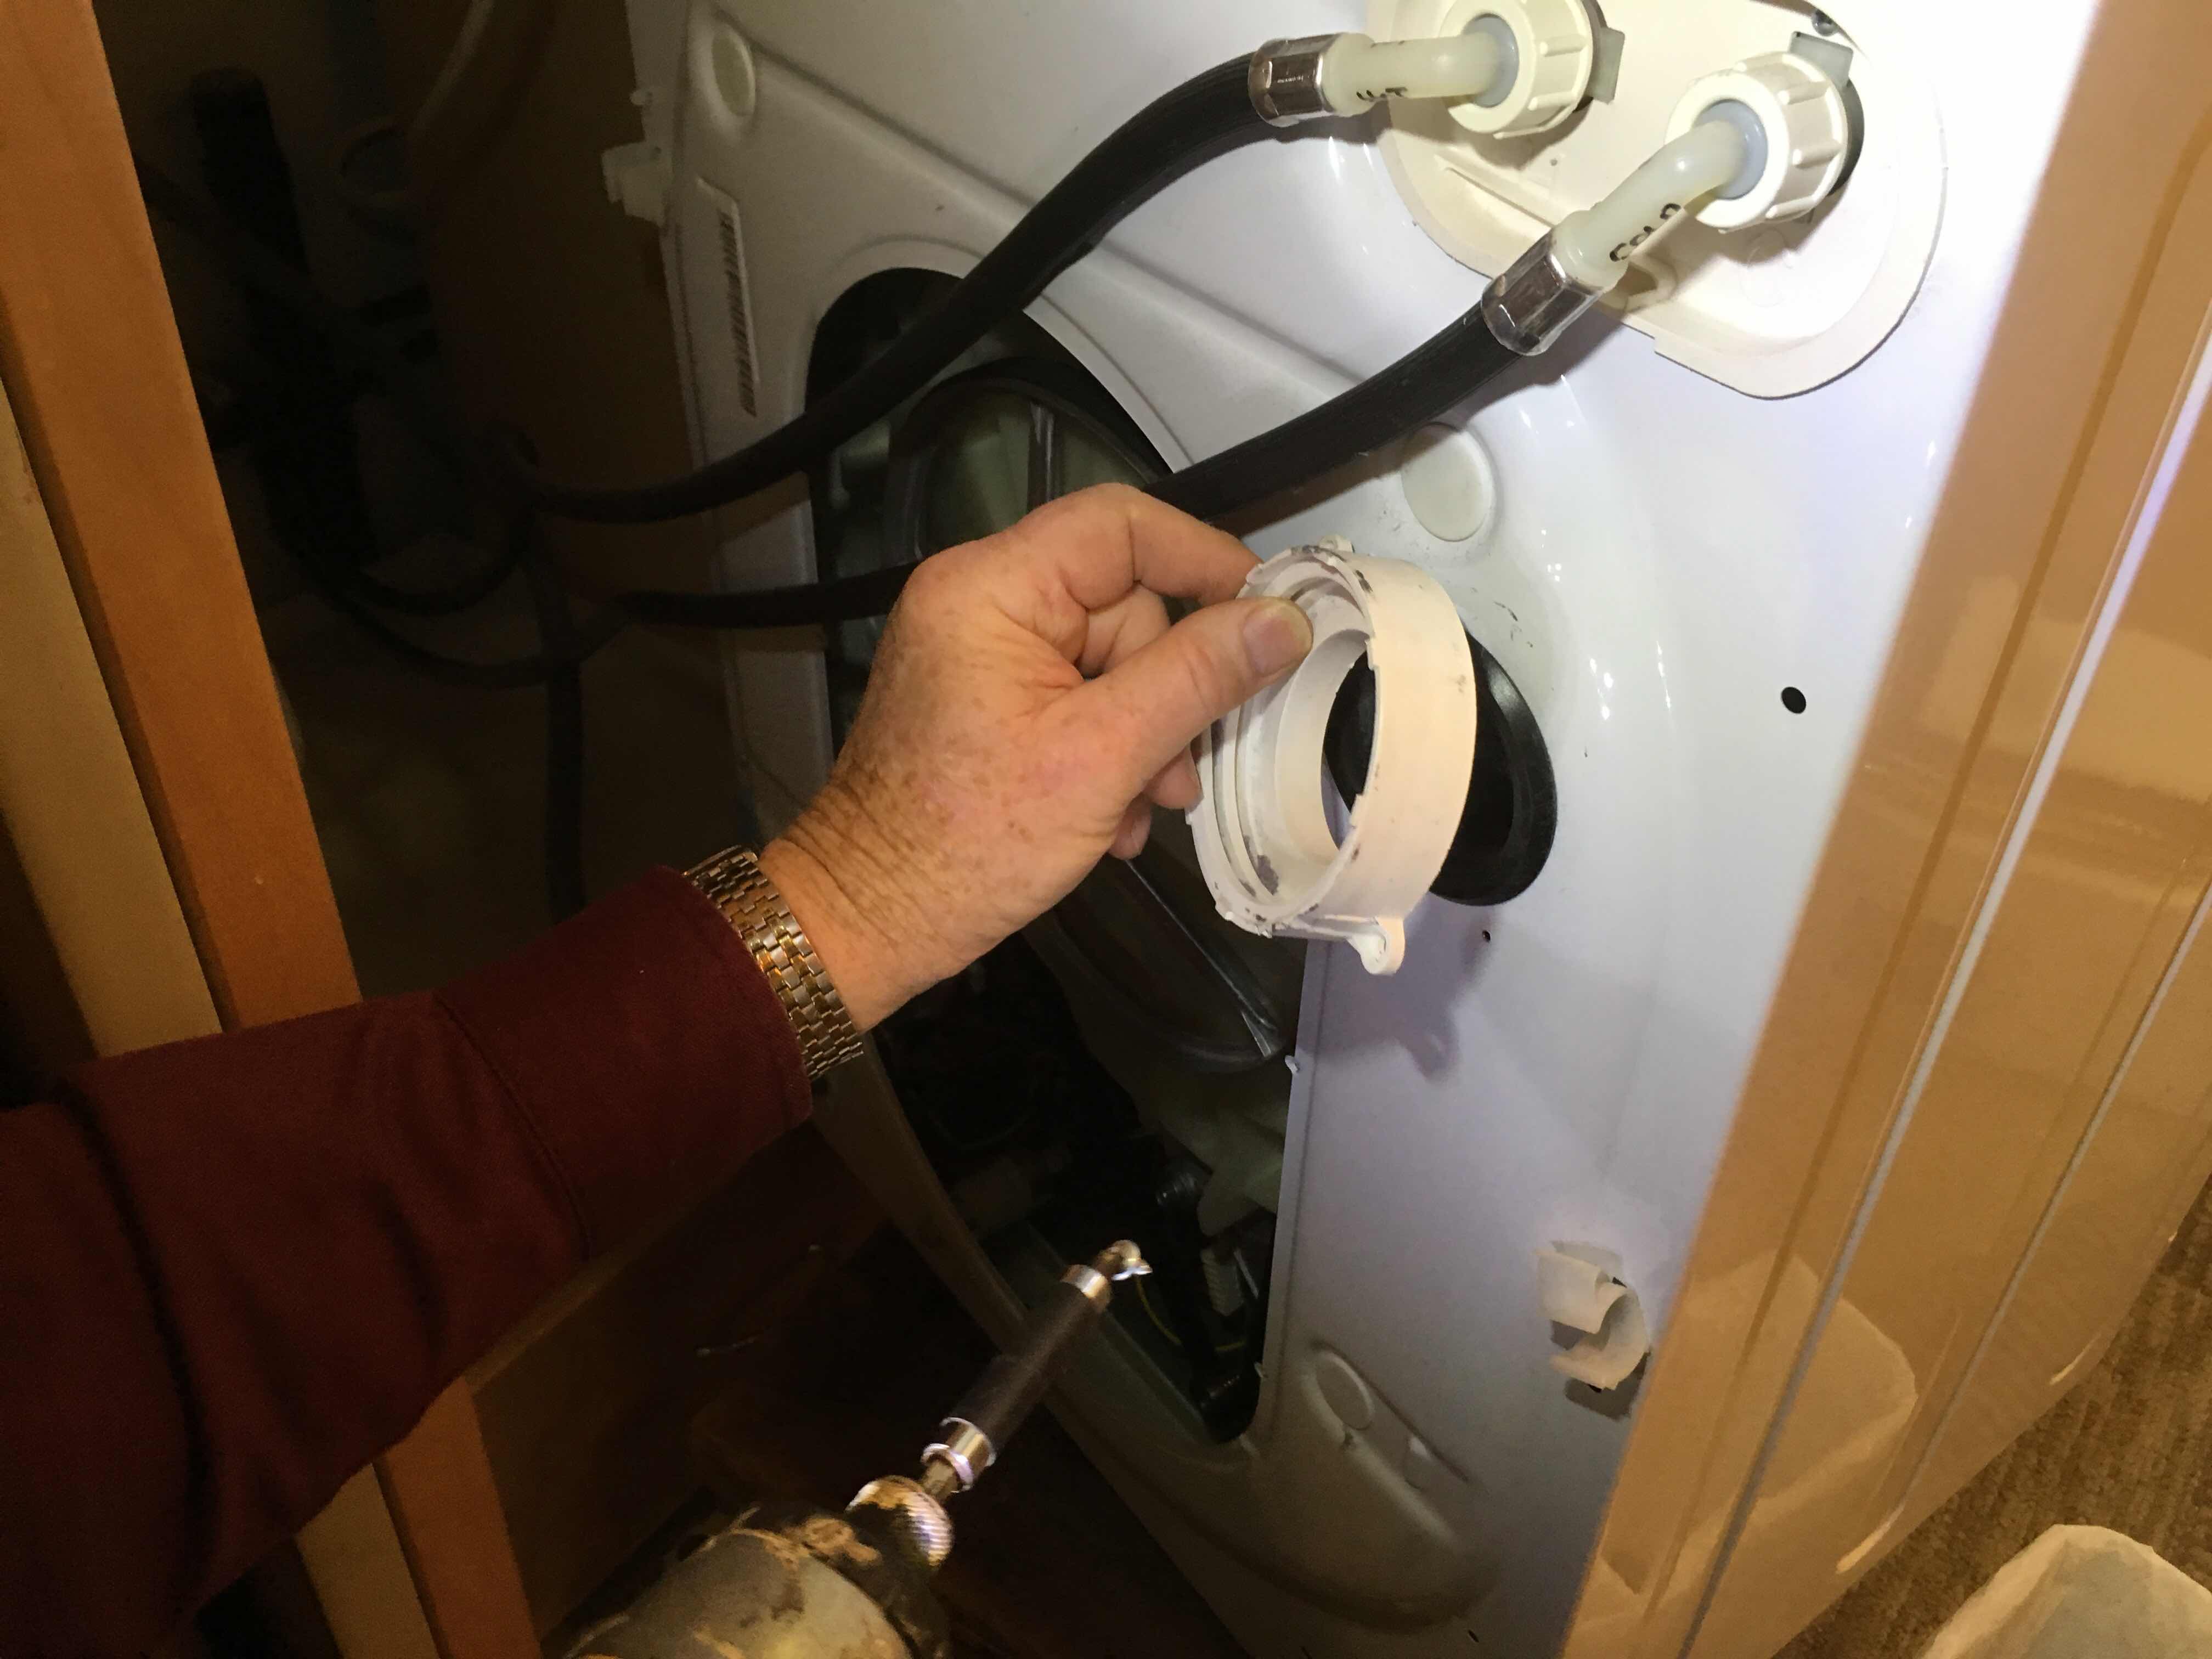 |
| Removing the hose coupling flange |
 |
| Wall cut-out with snap in cover plate |
Lucky for me It wasn't too hard because I cut an inspection hole in the wall when we installed it. All I had to do was remove the snap-in cover and uncouple the vent hose from the wall connection
Once out, I ran the dryer for a minute to see what kind of air flow I was getting- (none)
 |
| Using a stiff wire to dig out lint |
I made a wire tool to dig out lint and was only moderately successful. The lint near the top came out quickly, but the lint in the bottom bend was wet and clumped tightly together, and didn't want to move
 |
| Using a flexible grabber tool to grab lint out of elbow |
 |
| Using a bottle brush to sweep out any remaining lint |
I finished up with a cylindrical brush that I bent to match the bend in the ducting. I would sweep the sides and bottom of the elbow and attempt to get the residual lint stuck in the bristles of the brush.
 |
| A sample of the lint removed from dryer S bend |
x
Once I reassembled the dryer and slid it back into it's cabinet, we had a chance to run it in "dryer" mode and we had significant air flow to the outside!
Doing a load of laundry was further proof that the problem was solved for now.
Hope this helps someone else get their dryer back on line.
Your Traveling Friends
Jeff and Joan

It was really insightful.
ReplyDeleteThanks for such a nice content.
Cheers
BTW if anyone interested more have a look rvguiders.com thanks
When I called Splendie the first time about this problem I was told to squirt water down the rubber elbow, it worked but I am thinking it just compacted the lint and made the problem worse later I am going with your grabber method this time thank you.
ReplyDelete